The Backbone Of The Electrician Industry

Career Guide for Electricians

Electricians install and maintain electrical power systems in homes and businesses. They provide maintenance and repair of existing electrical systems.

Electrician Summary

Job opportunities should be good, especially for those with the broadest range of skills.

Most electricians acquire their skills by completing an apprenticeship program usually lasting 4 years.

About 79 percent of electricians work in the construction industry or are self-employed, but there also will be opportunities for electricians in other industries.

Working as an Electrician

Electricians install and maintain all of the electrical and power systems for our homes, businesses, and factories. They install and maintain the wiring and control equipment through which electricity flows. They also install and maintain electrical equipment and machines in factories and a wide range of other businesses.

Electricians generally focus on either construction or maintenance, although many do both. Electricians specializing in construction primarily install wiring systems into factories, businesses, and new homes. Electricians specializing in maintenance fix and upgrade existing electrical systems and repair electrical equipment. All electricians must follow State and local building codes and the National Electrical Code when performing their work.

Electricians usually start their work by reading blueprints— technical diagrams that show the locations of circuits, outlets, load centers, panel boards, and other equipment. After determining where all the wires and components will go, electricians install and connect the wires to circuit breakers, transformers, outlets, or other components and systems.


How to Become an Electrician

Starting a new career can be confusing at times, and perhaps a bit scary. Don’t worry. We are going to show you everything you need to know about how to become an electrician in our complete step guide.

What is the Electrician’s Salary and Wages?

Let me give you a brief run-down of the electrician’s salary and wages. Not only does the electrician enjoy steady and satisfying work, the electrician’s salary and wages are the highest paid of the skilled trades due to the technical knowledge and diverse skills that are required to perform a broad range of tasks. This is good news when learning how to become an electrician.

Apprentice Electrician Wages

The starting wage of an apprentice is usually 40% of a fully trained electrician’s wage. Your pay should increase along with your skills and value to your employer. Electricians in manufacturing, and power generation and transmission, usually have higher wages than those in construction.

Most electricians work full-time, which may include evenings and weekends. Of course, work schedules can change during bad weather or unpredictable delays. On the other hand, during scheduled maintenance or on construction sites with a looming deadline, you can expect to work overtime.

Consider the Electrician Job Description

It can be challenging deciding on a vocation. Without a clear picture of what you’re getting yourself into, you might feel unsettled or indecisive. The first step in learning how to become an electrician is to make sure you understand what the job entails. With this in mind, take an in-depth look into the electrician job description. It will reveal whether or not a career in the electrical career is a good fit for you.


Your guide on how to become an electrician

There will always be a need for tradespeople who work with wiring, machines, and other electrical equipment. Electricians keep us powered up, and they possess specialized skills to do work that could be dangerous in the hands of an amateur. If you are considering joining the ranks of these essential professionals, there are several things you need to know about becoming an electrician

What do electricians do?

This seems like a no-brainer: electricians work with electrical equipment. That job description is both accurate and completely inadequate because the term “electrical equipment” includes so much and the work is so varied. Electricians perform repairs, installations, and maintenance. We are probably most used to having electricians visit our homes to install new outlets or repair faulty wiring, but they also perform their work in factories, construction sites, shops, and businesses. They work indoors and out, and the equipment on which they work stretches well beyond household appliances and wiring. Electricians may also decide to specialize in wiring airplanes, ships, cable and data systems.

As for the less-specialized electrician, there are four common types:

Residential wiremen, who install and repair household wiring.

Inside wiremen, who install and repair wiring in non-residential structures, such as factories, arenas, airports, schools, and office buildings.

Outside linemen, who lay the cables that connect power plants to residences and buildings.

Telecommunications electricians, who install television, telephone, and Internet cables.

What skills do electricians have?

Electricians do a lot more than connecting cables from one power source to another. They possess a large quantity of skills, both general and specific to their particular areas of specialization.

General skills include:

Understanding the National Electric Code, which is the regional standard for electrical safety requirements

Problem solving

Electrical safety

Working with tools such as amp meters, digital multimeters, pliers, measuring devices, drills, saws, etc.

Reading blueprints

Plotting the installation of wiring throughout buildings

Locating and replacing faulty wires

Working with circuit breakers and fuses

Locating the energy flow to transformers and circuit breakers

Assessing the work of other electricians

Ensuring that electrical work is up to safety standards

Managing electrical crews

Mentoring apprentices


How to hire guide: electricians

All electricians need to be suitably qualified for the work they undertake. Much domestic installation work falls under Part P building regulations, which means it must be certified by your local authority building control. The simplest way to do that, is to ensure the work is carried out by someone who is a Part P registered ‘competent-person’, as that way all the relevant notifications and paperwork will be completed for you.

Part P-registered firms are vetted to ensure their work is up to standard. They have specialist equipment and know the standards required to pass an electrical safety check. If you use an uncertified electrician, you may have to pay your Local Authority building control a fee to inspect the work.

Which? Trusted Traders endorses electricians in your area, checking their business practices, terms and conditions and taking references from previous clients to help take the worry out of choosing a trader. All Which? Trusted Traders endorsed electricians have the necessary qualifications to carry out electrical work in your home.

It’s worth checking whether the electricians on your shortlist are registered with one of the government-approved schemes run by bodies such as National Inspection Council for Electrical Installation Contractors (NICEIC), ELECSA, NAPIT or others. Contact the scheme directly to check that the electrician is registered. In the event of something going wrong, you’ll receive support from the scheme operator.

The Electrical Safety Council says it is seeing a growing problem with tradespeople such as builders or kitchen fitters subcontracting electrical work to unqualified individuals. Rather than assuming a tradesperson will check an electrician’s background, qualification and registrations, the Electrical Safety Council recommends that you ask to see proof of the electrical contractor’s ability yourself. Any electrician who is reluctant to do so should be avoided.


Electrical Installation

The study of a proposed electrical installation requires an adequate understanding of all governing rules and regulations. A list of most common IEC standards is provided. The total power demand can be calculated based on the location and power of each load, together with the knowledge of the operating modes (steady state demand, starting conditions, non simultaneous operation, etc.).

The power and number of sources required to supply the electrical installation is readily obtained, also taking into account local tariff structures, to allow the best choice of connection arrangement to the power-supply network, e.g. at medium voltage or low voltage level.

Standard voltages between 100 V and 1000 V (IEC 60038 Edition 7.0 2009-06)

Note:

* the lower values in the first and second columns are voltages to neutral and the higher values are voltages between phases. When one value only is indicated, it refers to three-wire systems and specifies the voltage between phases. The lower value in the third column is the voltage to neutral and the higher value is the voltage between lines.

* voltages in excess of 230/400 V are intended for heavy industrial applications and large commercial premises.

* concerning supply voltage range, under normal operating conditions, the supply voltage should not differ from the nominal voltage of the system by more than ±10 %.

Note 1: It is recommended that in any one country the ratio between two adjacent nominal voltages should be not less than two.

Note 2: In a normal system of Series I, the highest voltage and the lowest voltage do not differ by more than approximately ±10 % from the nominal voltage of the system. In a normal system of Series II, the highest voltage does not differ by more then +5 % and the lowest voltage by more than -10 % from the nominal voltage of the system.

Regulations

In most countries, electrical installations shall comply with more than one set of regulations, issued by National Authorities or by recognized private bodies. It is essential to take into account these local constraints before starting the design. These regulations may be based on national standards derived from the IEC 60364: Low-voltage electrical installations.

Home Inspection A Question And Answer Guide

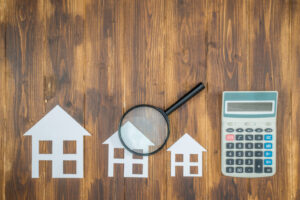
Professional Home Inspection Checklist

You’ve made an offer on a home, your offer was accepted, and now you’re in escrow waiting for inspection day. How will you succeed? By crossing items off our thorough home inspection checklist.  With a home inspection checklist by your side, you’ll move into the home of your dreams in no time.

Buying your first home is accompanied by a myriad of emotions. You’re excited because you finally have a place to call your own. You’re nervous to look at your savings account after paying a down payment. You’re exhausted after spending months working with an agent to find the perfect home.

Don’t worry, this rollercoaster of feelings is completely natural and will come to an end soon. The hardest steps are out of the way when all that’s left is an inspection and final walkthrough. And because the inspection process can be demanding, we’ve created an ultimate home inspection checklist to ease your fears and help transition you into the home of your dreams.

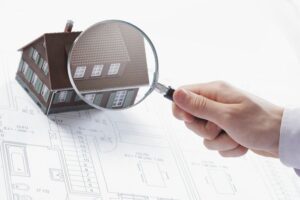
What Is A Home Inspection

A home inspection is an examination of a newly purchased property for any potential issues. The process is typically conducted by a professional inspector, who will then provide a full status report on the home. The purpose of a home inspection is to reveal any problem areas before the end of the closing process. This provides both buyer and seller a chance to renegotiate or even walk away from the transaction if necessary.

While it may sound scary, a home inspection is actually one of the best safeguards put in place for homebuyers. In many cases, home inspections do not reveal any surprises at all. But, when they do buyers can communicate with the sellers about a potential fix. Any fixes that are made can be checked over in the final walkthrough. It is absolutely crucial to get a home inspection, even if you have a great feeling about the property. The home inspection process can protect you, and your wallet, from a number of unexpected surprises in the future.


Home Inspection: What to Expect and What to Inspect

Inspection day is often one of the most exciting moments of home buying because it’s likely the first chance you have to go inside the home since you made your offer. It’s also usually the last chance you’ll have until a final walkthrough. But more importantly, it’s your opportunity to make sure you know what you’re getting yourself into when it comes to the condition of the home.

Home inspections don’t just provide you with a list of problems you want to negotiate with the seller to fix or something catastrophic that makes you back out of the deal altogether. It will provide you a detailed report that is something of a “new owner’s manual” for the home. It will include maintenance tips and schedules you should follow.

Finding an inspector

You should hire a licensed, professional inspector to conduct a thorough inspection. How do you choose one? Along with agents, lenders and other home pros, Zillow has lists of inspectors with reviews. You can use the Agent Finder tool to find all kinds of real estate pros, including inspectors. Get recommendations, check their online reviews and study their websites. Get a sample report to make sure what they will produce is thorough. Your agent probably has suggestions but you don’t need to use them.

You will want to be clear on exactly what is and isn’t included in the inspection price. Will they test for lead paint? How about asbestos in the ceiling tiles? Is that part of the basic inspection or will it cost more? The price, though you will pay it, is probably the least of your concerns. Most inspectors are in a similar range of $300-$500 anyway and any fluctuation is a small price to pay for what you will get. Early in the home buying process start researching inspectors and have at least a couple in mind, especially if the market is busy. You’ll need to be sure you can get an inspection scheduled within your contract timeline, so if your first choice isn’t available, you need someone waiting in the wings.

Inspection day

You should plan on being there and your agent should be right there with you the entire time. Chances are the seller’s agent will be there, too to help get any quick answers the inspector might need. Block off the entire morning or afternoon. Home inspections take time and you don’t want to rush through it. During this time, follow along as much as you can. You don’t have to follow the inspector into the crawlspace – they bring protective clothing just for that – but anyplace reasonably accessible, you should go too.


A BUYER’S GUIDE TO HOME INSPECTION

homebuyers should skip. Foregoing the home inspection could cost buyers lots of money later. You wouldn’t want to buy a $300,000 house and later discover a huge defect that will cost thousands of dollars to repair. A home inspection is like the doctor’s checkup you get covering major systems and diagnosing problems. Many states require sellers to provide buyers with property condition disclosure forms, but it’s a good idea to hire an independent home inspector.

HOME INSPECTION BASICS

A home inspection is a detailed report prepared by a home inspector about the condition of home systems, deterioration, and recommendations. The inspection could take between 2 and 5 hours and may cost between $250 and $500. Many buyers attend home inspections so they can better understand the issues, ask questions, and learn more about the house and its major systems.

THE WHY OF HOME INSPECTIONS

Buyers often order home inspections to ensure the major systems are in good condition and that there are no serious, expensive defects. Sellers might order a pre-listing inspection to identify major problems that need to be fixed before the house is put on the market. Common in most sales contracts, a home inspection contingency makes a sales conditional upon the outcome of the home inspection report. A home inspection is also a good way to identify repairs to request and to learn about the elements and systems of a house.

ELEMENTS OF A HOME INSPECTION

The home inspector will examine major elements of a house, ensuring proper operation of systems, observing the condition, and noting damage. A typical home inspection report will cover:

The exterior: Roof, driveway, walkways, steps, doors, decks, and siding among other elements.

The structure: Foundation and framing. The inspector determines whether the foundation and framing are sound and the building skeleton can withstand the elements.

The interior: Windows and doors; ceilings, walls, and floors; attic and basement.

Plumbing and electrical systems:

Water supply, heating, and drainage

Service entrance wires, breakers and fuses, and control panels

Heating, cooling, and ventilation/insulation

The inspector may also look for signs that one system has damaged another system such as walls or ceilings. Home inspectors are not specialists, but they may recommend corrective actions. Other types of inspections may be necessary as well, such as a termite inspection and a radon inspection.


A Buyer’s Home Inspection Checklist

Make a more confident offer and be better prepared for the home inspection by looking at these parts of your future house during the initial walk-through.

Touring homes can be quite a rush. But while you’re ogling the features you love — like that breakfast nook and those built-in bookshelves — it’s also important to keep an eye out for potential shortcomings.

Buyer home inspection checklist

See something odd while touring your would-be home? It may not be the time to say something, but you’ll want to make a note so you can bring it up during the home inspection. (One easy way to do it: Snap a photo with your phone.)

Pay attention to these common trouble spots:

Exterior: Are the gutters and downspouts properly attached, and do they drain away from the house? What kind of siding is on the home? Is it in good repair?

Roof: Do you see stains, dark spots or even moss? Any missing shingles or tiles? Ask when the roof was last replaced.

Foundation: Do you see any big cracks? Are there trees close to the foundation? Does any part of the ground near the foundation seem soggy, squishy, or sunken?

Windows and doors: Do they open and close easily? Do any seem misaligned? Do you see any signs of moisture around the frames or between the panes?

Smells: Do you notice any unusual scents? (The real estate agent’s cookies baking in the oven don’t count — think odors that might indicate the presence of mold or mildew.)

Attic and basement: Can you see any signs of moisture or water intrusion? If the attic or basement is unfinished, what kind of insulation do you see? Is it in good condition?

Heating and cooling: What systems are in place and are they functional? Look for a serial number or manufacturing date to get a sense of the system’s age. If there’s been a replacement, is the old system still in place? (For example, if the home was converted from oil to propane, is there still an oil tank on the property? An improperly decommissioned fuel tank can be hazardous.)

Plumbing: How’s the water pressure? Do the fixtures work? Any signs of leaks in under-sink cabinets? How old is the hot water heater?

Electrical: Do all light switches work? Are all the outlets grounded? (If you spot any that are two-prong, those are definitely not grounded.) Does the house have an older electrical panel with fuses or a newer one with circuit breakers, or both? Outdated wiring can be a hazard in itself and a hassle to upgrade.

Major appliances: If appliances like the oven, refrigerator, washer or dryer are included with the sale, what’s their condition?


Home Inspection Tips to Get Through the ‘Deal Killer’ Phase of Selling Your House

Home inspections have a reputation for being deal killers. In fact, one out of every 20 real estate transactions hits a fatal snag along the way, and nearly a third of the ones that don’t make it to closing fall apart because of issues that turned up during the inspection, according to data from the National Association of Realtors.

Although real estate is an appreciating asset, a property’s physical structure naturally deteriorates over time and requires significant upkeep. Although some problems that arise will be apparent—like a burst pipe or deep crack in the driveway—not all of the wear and tear on a home’s inner workings are visible to the naked eye

That’s why when the time comes to sell your house, the inspection could yield surprises even if you’ve kept to a routine home maintenance schedule. It’s a nerve-wracking position to be in as a homeowner, so we’ve asked experts in the field for their top home inspection tips to help sellers prepare mentally and logistically for this step on the road to closing.

Trust your real estate agent to help you navigate home inspection preparations and negotiations.

After you’ve accepted an offer on your house, the buyers of the home will schedule the home inspection within about a 10-day time frame. Depending on how many times you’ve sold a house before, you may have little to no experience preparing for the home inspection and the negotiations that will follow.

Your real estate agent should help you:

Understand the types of home maintenance issues that are common in your area, whether it’s signs of water leakage in a region where every home has a basement, improper electrical wiring in a neighborhood of historic homes, or pest issues in warm climates.

Craft a game plan for any repair requests—to think about whether you have time to hire contractors to fix issues yourself or offer repair credits in the event that problems do arise.

Take the pulse of your real estate market to determine how much leverage you have as the homeowner depending on if you’re in a buyer’s market or seller’s market, and how eager prospective buyers will be to snatch up your house.

Differentiate between minor and major home inspection findings and what constitutes grounds for negotiations (cosmetic repairs versus issues that pose a health or safety threat).

Water Testing Methods: Analysing Water Using ION Concentration Testers

What To Know About Mold Swabs and Air Quality Testing

Air Quality Testing

Air sampling tests the concentration of mold spores in your home’s air.  Samples are taken from the air and are later examined under a microscope.

Air tests can tell you if you have a mold problem even if you cannot find the mold growth. However the amount of mold spores in the air can change drastically in a small amount of time, giving varying results at different times.

Mold Swabs /Surface Samples

Surface testing takes samples from household surfaces to find the amount of mold growth and spores deposited around the home. Samples are collected by swabbing.  The sample is then examined in a laboratory.

Like with air testing the results can vary because mold growth and spores aren’t spread evenly across surfaces in the home and can change over time. Unlike air testing though, surface tests can’t identify the exact concentration of mold spores in the air.

Why You Should Test for Mold

The main reasons for having mold testing performed in your home are:

  • You notice signs of mold such as a mold smell or mold symptoms
  • To identify the species of mold in your home
  • To help you find where mold is growing-
  • To test indoor air quality by measuring the amount of spores in the air
  • To test if mold in your home has been fully removed

Identifying Mold Species

Another reason for mold testing is if you want to find out what kind of species of mold is in your home. This is important for toxic molds since extra caution needs to be taken to safely remove toxic mold from the home. Two well-known toxic molds are Stachybotrys (often called toxic black mold) and Aspergillus. If you see mold which looks like a toxic species or if you are suffering toxic symptoms then you should have it tested before you try to remove it. The only way to identify the species of a mold colony for certain is to have a mold professional look at a sample of it under the microscope.


What Happens in a Full Mold Inspection?

If you suspect you have a mold problem, you can also bring in professionals for a mold inspection. Mold inspectors can search for mold in hard-to-reach areas of your home. They can search:

  • Walls and Wall Cavities
  • Foundation Walls and Crawl Spaces
  • Air Conditioning Systems and Heating Vents
  • Attic Spaces and Chimneys

A visual mold inspection can give you incredibly thorough answers about any fungal infestation in your property. Some mold inspectors will even perform an air quality test to increase their understanding of your situation. Mold inspections are your most expensive option for mold testing, but they can provide you with the most comprehensive answers.


How to Test Air Quality in The Home

There are many factors that can affect the air quality in your home. For the health and safety of all, it’s necessary to have the air quality in your home tested. The rule of thumb is the higher the indoor air contaminant concentration, the higher the health risks. The air pollutants in your home can come from harmful gases in the air or from mold growths. Mold and mildew can grow anyplace — on furniture, building material, wet carpet, inside the heating and cooling systems, as well as a host of other places. These mold spores can be very harmful. Harmful gases can be even more dangerous. The two most prevalent gases in homes are radon and carbon monoxide [source: Colorado State University]. Here are some ways to test the air we breath.

  • Carbon Monoxide Carbon monoxide is a very dangerous, colorless and odorless gas that is generated from incomplete combustion of fuel in household devices, such as stoves, furnaces, water heaters and fireplaces. Carbon monoxide can get into your lungs and inhibit the transport of oxygen through the body. Prolonged exposure to carbon monoxide can result in death. The only way to detect the presence of carbon monoxide is to purchase a carbon monoxide detector. This works like a smoke detector, sounding an alarm when the carbon monoxide level rises.
  • Radon Radon is also a colorless and odorless gas that rises naturally from the soil and enters the home through dirt floors, cracks in the basement floor and walls, and drainage systems. It is thought to be a major cause of lung cancer. The only way to test for radon is to purchase a radon detection kit.
  • Biological Pollutants Mold, mildew, viruses, bacteria and pollen are all considered biological pollutants. Mold and mildew grow in damp conditions resulting from high humidity, water-pipe leaks and constant condensation. Visual inspection and odor are the only ways to detect biological pollutants. When mold and mildew are found, you must clean the area thoroughly with ammonia, or some similar cleanser, to kill off the spores


How Easy Is It to Use a Home Testing Kit?

Most testing kits follow a similar process that is quick and easy to follow. In most cases, you will just need to take these steps:

  • After opening your testing kit, you will follow the directions for collecting air or surface samples from around your home. The kit will have all of the materials that you will need to collect your samples.
  • Take your samples and package them in your mailing envelope that comes included in your kit, and send them to the laboratory. The testing fees will be included in the price of the kit.
  • You will usually receive the results of your samples in 7 to 10 days after the testing is completed. This package will include a detailed report of the findings of the tests as well as specific suggestions on how you can improve these problems that they have detected. If you have further questions about the results, a contact number or email address is often included with the results.

As you can see, this combination of materials will give you all of the tools you will need in order to make your house a healthier place.


Combustion air pollutants

Second-Hand Smoke

Secondhand smoke – From anything that burns tobacco, as well as what a smoker exhales. Tobacco smoke contains over 4,000 compounds, and at least 40 of those are carcinogens. Besides the risk of lung cancer for anyone breathing it, secondhand smoke increases the risk of respiratory infections, especially in infants and children. For kids or anyone with asthma, it can be particularly harmful.

Detection is easy enough. Tobacco smoke is easily seen and smelled. It seeps into fabrics, hair, and furniture. The yellow residue can cling to windows and mirrors.

Prevention is fairly simple. Don’t smoke in your house or allow anyone else to smoke inside. If you live in an apartment complex or other situation where a neighbor’s smoke comes in your home, you’ll need to find ways to seal up air leaks. Investing in a good air purifier placed near the source of entry is another solution.

Carbon monoxide – This gas, in high concentrations, can cause unconsciousness or death. Low concentrations lead to headache, dizziness, nausea, fatigue, weakness, and confusion. It’s so dangerous because it’s colorless and odorless.

CO is emitted mostly by things that burn fossil fuels: stoves, fireplaces, kerosene heaters, gas-powered generators, cars, etc. Prevention lies in keeping flues and chimneys clear of blockages and never running gas-powered vehicles or machines indoors. However, some indoor gas appliances can malfunction and emit dangerous levels of CO.

The Many Uses Of A Drinking Water Testing

How to test water quality? Chemical tests for limited budgets

Thanks to modern chemistry, we can detect thousands of chemicals in water, even at extremely low concentrations.  The ever-growing list of tests that are available can feel overwhelming, and the vast majority of methods require state-of-the art lab facilities. Fortunately, we don’t need to test for everything! A much smaller and more practical set of tests can provide a good sense of chemical water quality for monitoring purposes.  The good news is that there are low-tech versions of these tests for situations when budgets are limited.

Test strips – These are small, single-use strips that change color to indicate the concentration of a specific chemical. Depending on the particular test, the user “activates” the paper or plastic strip by dipping it into the water sample and swishing it around, or by holding the strip in a stream of water. After waiting for a short time, the user compares the test strip color with a color chart to read the concentration of the chemical. These kits are extremely simple, but they are less accurate than other methods, especially if users don’t follow the instructions.

Color disk kits – Color disk test kits are available for a wide range of chemical tests.  In a typical set-up, the user adds a powder packet or a few drops of a liquid reagent to a water sample in a reusable plastic tube.  The user then places the sample tube in a small plastic viewing box.  This viewing box contains a plastic disk with a color gradient printed on it.  The user rotates the color disk to find the part that best matches the color of the sample, and then reads the concentration of the chemical from the disk.  Color disk kits typically have multiple steps and often include prescribed wait times, so they’re a little more complicated and costly, but generally more accurate.

Hand-held digital instruments – Lightweight and portable digital meters, colorimeters, and photometers are available for water testing.  They provide the most accurate results of these three testing methods, but they are also more expensive and delicate than the previous options.  These instruments require batteries and calibration.  While digital instruments are helpful to field technicians and are an essential part of any continuous or remote monitoring network, they are unlikely to be suitable for “citizen science” or crowdsourced water quality testing.

hemical water quality parameters

Having identified various test formats, the next question is: What do we test for?  UNICEF recommends prioritizing fluoride, arsenic, and nitrate for chemical monitoring.  In areas where the earth is naturally rich in minerals that contain fluorine and arsenic, levels in well water can be high enough that chronic exposure is dangerous to human health


Which Water Test Kit?

Multi-pack options

We offer a range of multi-packs, the kits vary in content, please see the table below for details. These simple, affordable one-of-a-kind kits test are ideal to screen water samples for many different elements. These can include up to 12 of the most common and potentially hazardous contaminants found in drinking water e.g Bacteria, Lead, Pesticides, Nitrates, Nitrites, Chlorine, pH and Hardness. Fast & accurate results are available on the spot.

The type of water testing kit, which is required, depends on what water should be tested and if there is any suspected contamination (also see Unusual colours, smells and taste of your water). All of the kits below are suitable for fresh & potable water, this includes water from taps, springs, aquariums, lakes, ponds, streams, wells, boreholes, puddles and leaks as well as water stored in tanks

Water Test Kits for a single contaminant

Enables users to identify levels or precence of a single contaminant in drinking water with instant results

Digital Water Test Kits for single & multiple tests

These easy-to-use photometers do not need calibrating and have a manufacturers warranty of 2 years

Further Free Resources:

Got a question about water testing? Try our complete list of Free Water Testing Resources.


Best Water Test Kit

There are lots of different brands to choose from. How do they compare with each other? Do homeowners’ water testing results match up with those from a professional lab? Which is the best home water test kit?

I had the same questions. So I decided to get my hands on some and try some water testing myself. Keep reading to find out how I conducted my experiment, and what I found out.

How I Tested the Water Test Kits

The water at my house comes from a 185 foot deep drilled well. It’s cold and clear and tastes fantastic. But taste alone doesn’t tell you the true state of your water quality.

When my husband and I bought the house a few years ago, we were told that our well water quality was fine. But we never had any water testing done ourselves. It was always in the back of my mind that I really should get it checked, just to be sure.

So, I finally stopped thinking about it and ordered six different water test kits from Amazon. I decided to go with kits that are well known and that are affordable for most people.


How to Test Your Tap Water

How safe is your tap water? Finding out can take some time, effort, and money, but it’s worth doing.

Most people on municipal water who pay their own bill should receive an annual water quality report called a CCR, or Consumer Confidence Report. If you don’t receive yours, call your local water supplier. And if you rent, contact your landlord.

If you’re on well water, you won’t get a CCR, so you should get your water tested. That’s also a good idea if your home was built before lead-free pipes were mandated in 1986: Even if your CCR says that the municipality’s water is free of lead, it can leach into your water from the pipes in or leading to your house.

Many kits are available for do-it-yourself tap testing, but it’s not always clear what they test for or how accurate they are. The EPA recommends using a certified lab. Find one on the EPA’s website. Testing typically costs $20 to $150; your community might provide test kits free of charge

For multiple or high levels of contaminants, reverse osmosis filters are often best. They can remove lead, arsenic, bacteria, and other contaminants. But they take up a lot of space (typically under your sink), require additional plumbing, and often go through several gallons of water for every gallon of filtered water. They’re pricey, too, some costing $1,000 or more. You might also have to pay a professional to periodically service the system.


The Best Water Quality Test Kit for Your Home

If you’re worried about your home’s water quality—as many Americans justifiably are, in the wake of water scares in Flint, Michigan, and Newark, New Jersey—a home water quality test can ease your fears. After 50 hours of reporting, and after testing 11 different home water quality test kits, we’ve found that the SimpleWater Tap Score Advanced City Water Test is the best water quality test kit for your home. It measures a wide range of more than 100 potential contaminants and delivers the results in an easy-to-read, richly detailed report. If you’re worried only about lead, we recommend the much cheaper Safe Home Do-It-Yourself Lead in Drinking Water Test Kit.

The SimpleWater Tap Score Advanced City Water Test is a send-away kit: You take samples of your water, put them into a handful of bottles, and ship them off (using an included mailing label) to a certified laboratory. There, your water is tested for more than 100 compounds, including metals such as lead, mercury, and arsenic; volatile organic compounds (VOCs) like chloroform; bacteria; and industrial and agricultural compounds like pesticides and nitrates. Tap Score is not the only highly accurate send-away kit, but no other kit we tested delivered nearly as useful a report. Tap Score not only tells you, in plain language, exactly which compounds are in your water (and the amount) but also explains their potential health risks and suggests ways of addressing any concerns. Tap Score also offers unmatched online support. You can chat with a representative, and if your questions go beyond their knowledge, the questions are passed on to experts, who follow up with a detailed email. All of this makes Tap Score by far the most user-friendly and informative home water quality test kit we found.

If for some reason you are unable to use Tap Score, we recommend two runners-up: the WaterCheck CityCheck Deluxe and the Safe Home Ultimate Drinking Water Test Kit. Like Tap Score, these are send-away kits; you put samples into bottles and ship them to a certified lab. We found that the testing was just as accurate as Tap Score’s (and, in fact, National Testing Laboratories, which makes the CityCheck Deluxe kit, is among the more than 60 labs Tap Score partners with). But both of these kits are more expensive than Tap Score, and their reports aren’t as easy to understand. The reports are still much more readable than those of some other send-away kits: They’re color-coded, so you can quickly see contaminant levels of concern. But they lack Tap Score’s clear explanations, actionable advice, and robust online support. The CityCheck kit also lacks an included mailing label, so you’ll have to take a trip to the post office or another shipper.

Our budget pick, the Safe Home Do-It-Yourself Lead in Drinking Water Test Kit, doesn’t have to be sent away—you can get the results at home yourself. It tests only for lead, but if that’s your sole concern, this DIY test is a great option. The Safe Home Do-It-Yourself kit is widely available, inexpensive, and fast (the test takes a total of 10 minutes and less than 30 seconds of active work). And it delivers a clear positive or negative result: Your lead levels are either below the EPA standard or above it. You simply dip a strip of test paper into a sample of your water, and the presence or absence of a blue line tells you whether you have a lead problem. If you don’t, you’ll have peace of mind. If you do, you’ll know it’s time to enlist a professional plumber or an environmental service to help you find and address the source of the problem.

We do not recommend any of the more-comprehensive DIY test kits that are available. We tested six of them and found that the tests were so rushed and the results so subjective (you’re asked to match the color of your test sample to a chart by eye, with only seconds to do so) that we didn’t trust our ability to interpret them. If you want a complete picture of what’s in your water, we strongly recommend that you go with one of the send-away kits and let a professional lab do the testing.

What To Do During Mold Remediation Procedures

How to choose the right mold remediation company

Check your phone book or the web for a local mold remediation company.

Refer to the 3 critical questions to ask every mold company before they enter your home.

Call a company on the list and ask them each of the 3 critical questions.

I hope this guide has helped you regain control of your home. If you use us for your mold project, we’d be thrilled, but more importantly I hope this guide will lead you to a clean and healthy home


How To Choose A Mold Remediation Company

Discovering a thriving mold colony in your home presents a host of complex, potentially expensive problems – none of which should be addressed by any less than certified professionals. You may wonder how your property became infested in the first place and just how extensively the spores may have spread and multiplied beyond the first spot of growth you see. Likewise, it’s understandable to fret the potential health risks that accompany a mold invasion and just how costly remediation can become when compared to the estimated dollar amount of damage mold can do to your property.

The best mold remediation companies in any market will address your infestation in as thorough and timely a manner as possible while clearly answering any questions you may have and minimizing costs to the greatest degree possible. As with the process of comparison-shopping contractors for any professional service, you owe it to yourself to ask a battery of probing questions and gather several estimates before making a choice.

How experienced are the employees who will be working in my home?

First off, rule out any and every contractor with no proof of up-to-date insurance. Yes, they may have the edge in price, but the risks in the event of a catastrophe are not remotely worth it.

How familiar are your employees with the inherent environmental hazards of mold?

A quality mold remediator doesn’t have to be a medical expert or experienced health practitioner to grasp indoor water damage’s potential toxic risks. Your contractor should concisely explain the difference between symptoms of a minor mold allergy and a serious toxic reaction and what makes mycotoxins potentially lethal, especially to individuals with compromised immune systems.

What safety precautions do you take before, during and after mold remediation

To avoid cross-contamination, the contractor should lay down plastic sheeting and additional protection at all containment site entrances. Only HEPA-filtered negative air machines (NAMs) should be used during mold remediation, all of them exhausted outside the home. Scratch off any contractor who attempts to negate or minimize the importance of containment measures to avoiding the creation of additional hazards during the project.


MOLD REMEDIATION COMPANIES

Mold remediation companies provide a number of services necessary to deal with the problematic growth of mold in the home – mold inspection, mold removal, repair of household damage due to mold. Some mold removal companies are certified in mold remediation, though certification is not required of mold remediation contractors so that’s something you want to inquire about when selecting a company to take care of your mold problem.

Why Hire Someone?

Some people decide to just handle their mold problems on their own, and in some cases that might work out fine. However, the Environmental Protection Agency recommends not attempting to clean up a mold problem on your own if the mold covers more than ten square feet. The thing is, even though you may only notice a few square feet of bathroom tile affected by mold, mold spores spread easily through the air and mold can hide in many places, including your heating vents and air ducts. You probably won’t see it there yourself, but certified mold remediation contractors know how to track it down and take care of it.

Choosing Among All the Different Mold Remediation Companies

Unless you live in a very small town, you probably have several mold remediation companies from which to choose. Don’t just settle for the one with the biggest ad in your local yellow pages. You can call your local Department of Health for suggestions, or check with the Better Business Bureau. The important thing is to make sure you choose a company that will do the job right.

What to Expect

Most mold remediation companies offer a free inspection and assessment, during which they will examine your home for mold, tell you about the extent of your mold problem, advise you about the best way to resolve your mold problem and let you know what they will charge to handle the problem for you. Request that a certified mold remediation specialist perform the inspection. You can consult with more than one company if you like before deciding which one to hire.

When You Need to Consult a Professional

We recommend all homeowners consult a professional before beginning the process of mold remediation, and since most mold remediation professionals offer free consultations, that’s easy enough to do. In some instances, though, it’s particularly important to speak with a professional before you proceed. You may need to hire a professional, but even if you hope to do the work yourself,


How to Find a Trusted Mold Remediation Professional

When you discover mold is growing in your residential or commercial property, immediate action is important. The presence of mold can not only ruin the materials it is growing on, but mold can also cause individuals exposed to it to suffer from health problems, such as allergic reactions and other symptoms.

Mold growth is triggered when mold spores, which are naturally present, encounter a food source and a moisture source. This is also why mold growth is so common in the aftermath of water damage. If the water source that triggered the mold growth is not properly addressed, then the mold will continue to grow, and the damage will get worse

In cases where there is minimal mold growth, home remedies might be sufficient. Some people may choose to clean mold up themselves, too, as a way to save money. But home remedies should not be relied on, especially if you just want to save money.

Look into the Services’ Specifics

When you come across a mold removal company you might be interested in hiring, take a further look at what their services entail. The company should provide complete services that include initial inspection, containment, mold cleaning and removal, and final inspection.

The inspections are important, because the initial one allows the technicians to create a proper mold removal plan, and the final one ensures the mold has been completely removed. Meanwhile, the testing should be conducted by an outside source to ensure impartiality, and the cleaning should be conducted using safe, nontoxic cleaning products. Mold on its own can already be toxic, so you do not want the cleaning work to introduce further toxins into your environment.


PRACTICAL TIPS FOR CHOOSING A MOLD REMEDIATION CONTRACTOR

Roof leaks or high indoor humidity leads to excessive moisture which can cause a lot of damage to your properties. Undetected water damage in a home can lead to dangerous mold problems and cause many health issues. Attempting to resolve the mold issue yourself can cause the mold to spread quickly to other parts of your home

Mold removal is a complex process that needs extensive training, experience, and specialized tools so you should not just hire any mold remediation contractor that comes your way. Making sure they are worth your money is essential.

Make sure you’re dealing with professionals

You need to know you’re dealing with professionals. You can ask the remediation contractors to evaluate the affected area in your home. The manner they present themselves and how they answer your questions will tell you a lot. Look out for confident answers based on ensuring your health not just a price quote. Find out if they conduct air testing before and after remediation. Get the remediation contractors to explain the type of mold testing they do. If they do not conduct air testing, look elsewhere.

Make sure they are licensed and insured

Insurance is necessary for remediation contractors because it provides coverage in case of an accident. A license, on the other hand, says that the contractors are recognized and permitted to operate in your area. One thing that comes with being licensed is belonging to an association that emphasizes standards. This means licensed remediation contractors are equipped with the best standards available to rid your home of molds. Always choose contractors who are properly insured and licensed.

Check for free mold assessment

It is a popular practice for remediation contractors to provide an evaluation of your home at no cost. You can then take the opportunity to evaluate their professionalism. If a remediation contractor cannot provide a comprehensive assessment, you should not put them in charge of your project.