How Should I Choose Wedding Photographer

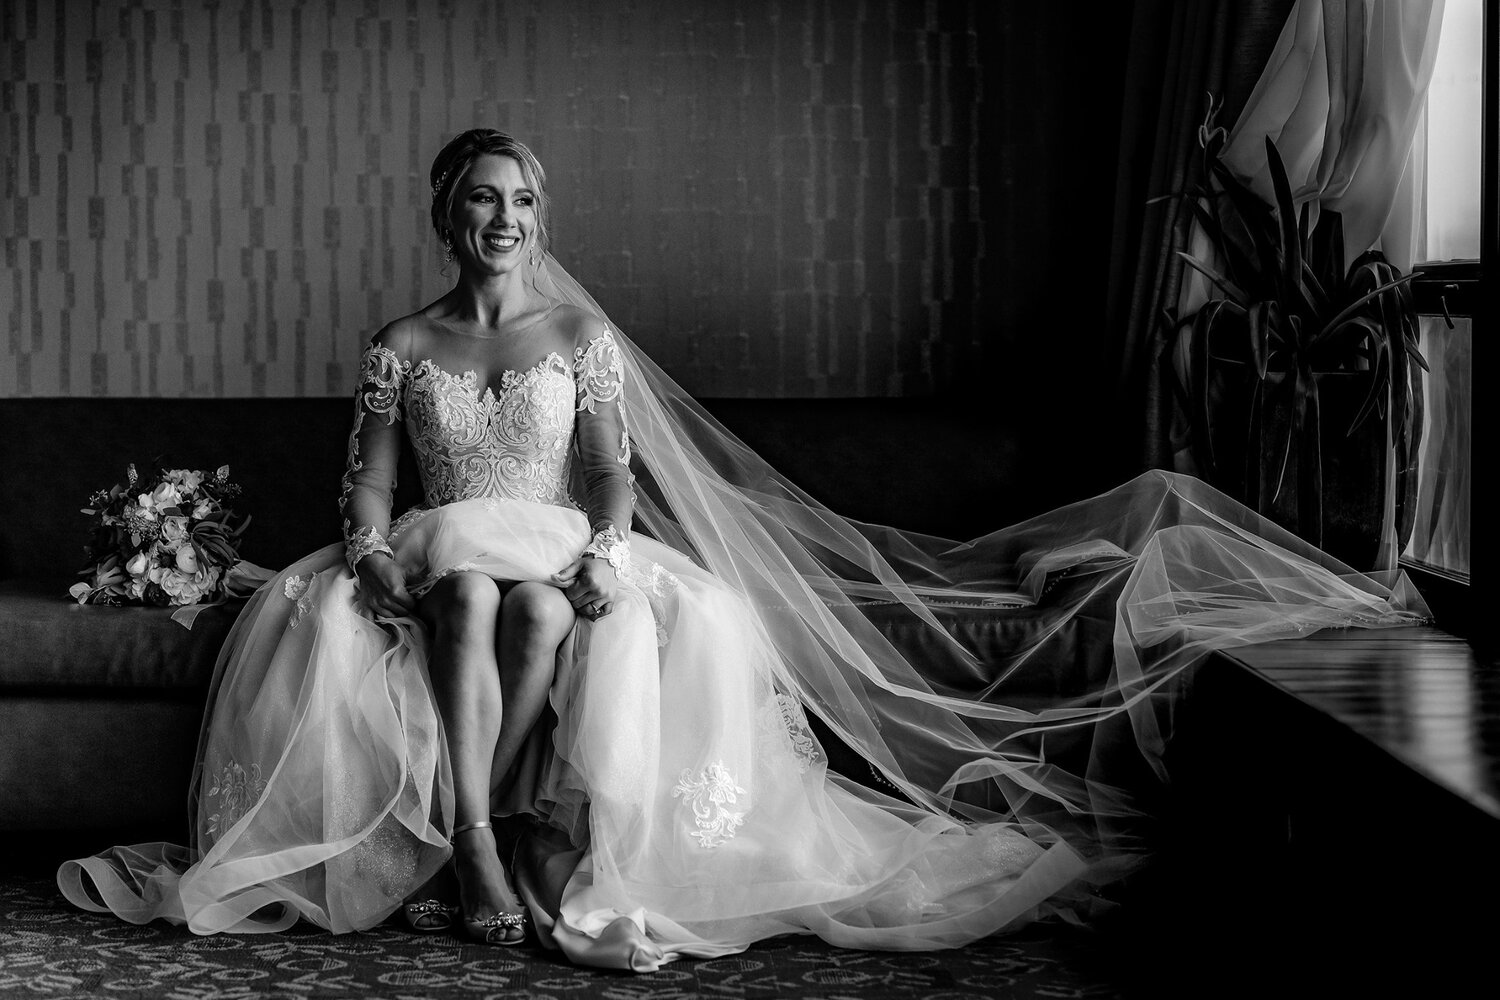
THINGS THIS WEDDING PHOTOGRAPHER LEARNED AS A BRIDE

As I come down from cloud nine from this amazing weekend, I thought I’d share a more personal blog post that I felt was kind of necessary. This weekend, I married my best friend and had the wedding of my dreams!!  Out of all the weddings I have shot over the years, it was so crazy to finally be the bride.  I’m still reliving the day over and over again, smiling to myself that this really happened.

In other news, it was really eye opening to be on the other side of things for once.  I learned a LOT about what it feels like to be the client, and what it feels like to the bride.  I really wanted to share some of the big things wedding planning taught me and some tips I can offer to current brides to help their day run smoothly.

Communication with your vendors is very important

The one thing that we did have some bumps in the road with, is a couple of mishaps with a couple of our vendors. One thing one that was helpful for us is to arrange a phone call with all of our hired vendors to make sure everyone was on the same page.  This is something that as a client that you shouldn’t feel bad about, as we are working for YOU.  It also did a lot in settling our nerves, knowing that all of our vendors were on the same page.

Do as much as you can as early in advance as you can!

We booked as many vendors as we could within the first couple of months of engagement.  When all the big stuff was taken care of, we took a seat for a bit as we both focused on other things for a few months.  A month before wedding, we realized we needed a lot of little things:  A card box, memory table frames, gifts for our parents, gifts for each other, gifts for our bridal party, escort cards.. the list goes on.  We had thought we had a leg up in the game, but when we realized we had so many little things left to do so close to the wedding, panic mode set in!

Spurge on the things that matter most to you, and budget on the others

Our priority vendor-wise was a couple of things:  An amazing photographer (duh), and our guests having a great time.  With that, we splurged and got a pretty great band which got our friends and family up and dancing, and our photographers were just incredible all day – we felt very comfortable with them and confident that they had everything captured for the day.  Flowers and center pieces?  We tried to go a little cheaper with.  We would rather spend more money on the things that are really important to us, rather than the things that we will never remember and our guests probably won’t notice.


Wedding Photography Client Gifts

There are a lot of things that I had to do to take my business from a side gig to full time – there’s no doubt that building a business is hard work, and the hardest part is getting people who actually want to pay for what you do. If I could tell you to focus on one thing and one thing only, I would say focus on the client experience

I like to think of it this way – if you loved the food at a certain restaurant, but the waiters were rude every time you went, and you had a bad experience, how likely are you to come back?

CLIENTS ARE WILLING TO PAY MORE FOR AN AMAZING EXPERIENCE.

Most people would rather go somewhere else, even if the food was more expensive – and that’s how it is with all things! People are willing to pay more for the experience, as long as it’s a good one. And especially if it’s one they won’t get just anywhere. Photos are no different. If you take beautiful photos, but your clients feel awkward and uncomfortable during the shoot, they’ll probably just remember that feeling when they look at the photos

MAKE YOUR CLIENT EXPERIENCE UNIQUE.

The client experience looks different for everybody – some people hang out with their clients or take them on a coffee date occasionally, which is awesome! I don’t personally do this (most of the time), just because I’m often traveling and it’s a little harder for me to maintain those in person connections. I am also more of an introvert, so it doesn’t feel super natural for me to become best friends with everybody. I’ve tried, and I kind of think people can tell when you’re trying too hard, haha. In general, being yourself just works out better.

How I do my wedding photography client gifts.

Back to wedding photography client gifts: I love giving them (it’s definitely my love language), and almost everyone I know loves receiving them. It’s just a cute little way to let your clients know you’re thinking about them, and when they get their gifts they often post them on Instagram stories or rave to their friends.


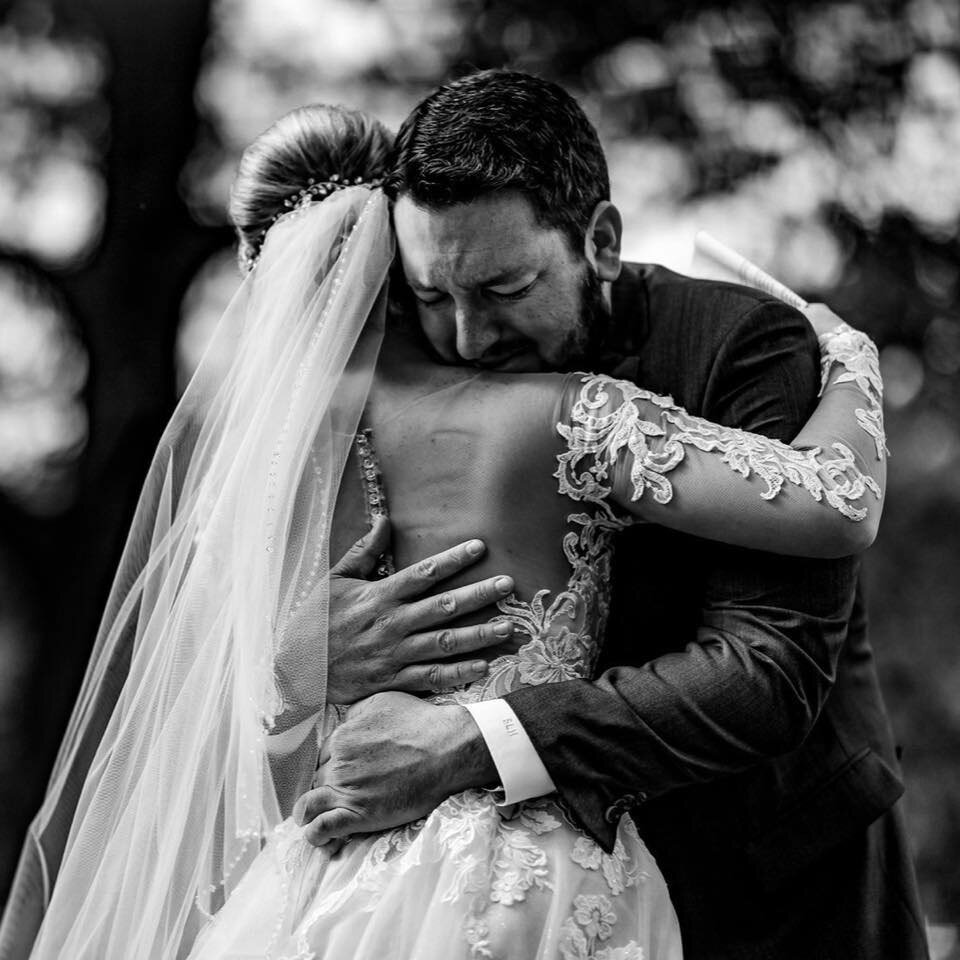
THINGS YOUR WEDDING PHOTOGRAPHER WANTS YOU TO KNOW

What your wedding photographer wants you to know. It seems simple, right? As wedding photographers, we’re supposed to show up on the date you’ve picked out and photograph it. Easy. Well, that’s not really all there is to it. I like to think of wedding photographers as the glue that holds a wedding day together.

Disclaimer here: I don’t want to discount wedding planners. If you have hired a wedding planner, first off — thank you, and secondly, they would be handling all of the logistics, last minute plans, etc.

Wedding Planners are Wonderful

I mentioned this above, but hiring a wedding planner really does make wedding planning so much easier. You won’t have to keep up with a million different vendor email threads, nor will you have to coordinate every single tiny detail (think about napkins, how they’re placed, what color, etc). There are so many things you don’t think you’ll need to do until you are in the thick of it. If I could go back (my personal advice from being a bride), I would undoubtedly hire a wedding planner

We Can’t Work Magic

Scenario: You’ve been scouring blogs like Style Me Pretty and Magnolia Rouge. You’ve stared at countless outdoor ceremony photos with floral arches underneath large moss-covered trees. You’ve fallen in love with a certain photographer and you HAVE to hire them for your wedding. Your big day rolls around, you have your indoor formal church ceremony in front of the altar, and all is well. A few months pass and you receive your wedding photos. You think: these do NOT look like the work I saw of “said photographer” on the blogs.

Indoor ceremonies and outdoor ceremonies have totally different vibes because they have totally different light. Can indoor ceremonies still be gorgeous and ethereal? Absolutely! Your wedding photographer wants you to know that different light will yield different results. Lack of light will not render beautiful skin or light and airiness like being outside will.


The Top Wedding Photographers in the World

You’ve secured an ideal venue and are collaborating with a planner who anticipates your every need—and if they’re worth their salt, they’ll likely refer a photographer from this list. Your decor, dress, flowers, and cake can all look perfect on the day of, but it’s the skillful shooting, expert lighting, thoughtful composition, and fly-on-the-wall discretion that will shape your memories as you look back on your wedding photographs in the years to come.

These are the photographers we recommend when asked and those who we trust to capture the portraits, moments, and details of life’s most sentimental events. Some of them have shot the most exclusive celebrity weddings; others are the go-tos for the It-girl and fashion set. Many of these talents have captured events all over the world—some approaching their work with a documentarian’s eye, while others are all about sheer romance. As for the best of the best, they’re all of the above.

We asked our photographer shortlist to share their points of view, process, expert advice, and more about their signature styles in their own words

The Look: Having shot mostly in film for almost 20 years, I’ve been able to master the soft, organic, and timeless look that classic film provides.

The Approach: It’s not just about taking the best photos—it’s also about how I make the clients feel. This is an experience from the first initial connection to the final deliverables; it all must be consistent and flawless.


Must-Have Wedding Day Photography Gear

Those who follow Portrait Session know that I consider myself to be an idiot when it comes to photography gear.  I’m unlike my fellow Improve Photography guys in that I don’t lust over the newest lenses, I don’t nerd out about the latest camera models, and I certainly have no idea what great new treats are soon to be released.  I do, however, have a certain passion for the things that every good wedding photographer should have in their bag, which is why I want to share with you what I believe is the must have wedding day photography gear.  The gear that will allow you to improve the quality of your photographs, and in turn take your business to the next level.

Now, I’m not here to say that you can’t be a wedding photographer if you don’t have all of these things in your bag.  I know that there are successful wedding photographers out there who shoot with old bodies or only 2 lenses.  I’m also not here to say that the gear I have is the best and you should run out and buy everything I own.  I am simply here to share the things that I think are crucial in order to be fully prepared for all of the environments and situations that weddings throw at you.  With these pieces of gear in your bag, I promise you’ll be ready to conquer a wedding day like a pro!

A good bag

There are approximately 72 million camera bags in the world today.  Some are cross body, others are backpacks, and others are roller bags.  Some hold a few lenses and a body, while others hold roughly 84 lenses and 17 bodies.  While much of what I’m saying here is exaggeration, one thing I will not exaggerate about is that every wedding photographer must have a bag that is big enough, strong enough, and safe enough for all of the gear necessary to be a GREAT wedding photographer.

A camera that performs well in low light

It’s inevitable that you’ll encounter extremely crappy light at some point on a wedding day.  Most churches have dull lights that cast a yellow hue on everything in site.  The majority of reception venues are dimly lit spaces with sometimes not even enough ambient light to be able to lock focus (that’s the WORST).  Because of this, it’s absolutely crucial for all wedding photographers to have a camera that will produce beautiful images even in dark situations.

A zoom lens

Going back to that church scenario mentioned above, it is also inevitable that you’ll encounter a church that restricts photographers.  I’d say that in at least half of the church weddings I photograph, I am restricted in some way.  Most often, this restriction is in the form of where I can move during the ceremony.  Some restrictions are more harsh than others, but I have been in some churches where I wasn’t even allowed to move out of the back row!  If I had not had my 70-200 lens, the couple would’ve looked like ants in every single photo!!

Home Renovation Based Business Opportunities

Things You Need To Know: A Home Renovation Checklist

Be an Informed Renovator

We love giving homeowners the insider information needed to master the art of a renovation! We created the Renovation Roadmap as an online tool that helps you navigate the remodeling process when working with a general contractor.

Ready, get set…wait!

A home renovation is a big undertaking. Sure, we might have tons of inspiration from HGTV and Pinterest boards, but most of also have budget and time constraints to consider. Before you start Demolition Day: Chip Gaines style, check out this renovation checklist first to ensure that all of your ducks are in a row.

Know Your Budget

Everything costs money and knowing your budget is one of the most — if not the most — important steps in the home renovation process. Being aware of your financial standing will help you prioritize what’s truly relevant for your home renovation. Yes, you may want a hot tub grotto, but is that more important than new marble countertops, a fresh set of cabinets, and hardwood floors? Also, keep in mind that surprises do happen, and you will more than likely end up spending more than you anticipated, so make allotments for that from the onset.

Focus on small sections of the house at a time

Unless you are planning on moving out during the house remodeling process, it is easier (and more economical) to focus on updating certain sections of your house a little at a time. If the bedroom, kitchen, and dining room are in shambles, your mental state is bound to be a wreck, too. If, though, you work on and complete certain smaller portions at a time, you’ll be able to have some reprieve from the renovation chaos

Gather inspiration

A well put together renovation checklist will include tons of remodeling ideas. Whether you create boards on Pinterest, take screenshots of Google pictures, or put together a vision board using magazine clippings, it’s important to know what you want before you go out looking for and interviewing contractors. That’s where the Renovation Roadmap comes in. Not only will your inspiration and planning help out the contractors — some might not be comfortable doing the type of work you’re seeking — but you will be able to keep a consistent visual flow going throughout your house.


How to Renovate Your House on a Budget These Days

House renovation can be costly as you move to make your house a luxury place with comfort and style. Staying on a limited budget during the remodeling process thus requires more than general concepts on how to renovate a house. You have to take into consideration a number of factors to avoid spending too much beyond the limits of your budget. This is where creativity and resourcefulness come in handy. Let’s have a look at some of the tips to make the renovation process easy.

Clean up

This is the first step before you introduce any changes in your house. Put every item away from the house and have it cleaned well. You will notice the house looks better right away. Cleaning will also give you the chances to visualize how household items are arranged. This will give you more ideas on how to choose different places to store your belongings or how to rearrange the furniture well. Doing so will make the renovation more effective and appealing to see. Get rid of any unnecessary items in the house. This will add more space to the house and make every room look much bigger than before. Crammed clutter makes the house look so messy. Moving furniture to different rooms will help add more space making your house more useful without spending a single cent.

Create natural light without putting windows

It is a noble idea to go for affordable and less invasive ways of bringing light into your house. This should be done before you rearrange the framing and make a large hole in the walls of your house. To come up with a windowless way with natural light, install a light tube for instance which taps light from the roof rafter to the living room.

Improve efficiency, not size

Equipping and rearranging the kitchen for maximum usefulness will help you avoid demolishing some of the walls of the house to gain more space. The shelves which consume a lot of space should be replaced with cabinets drawers. The preferred height of the pullout drawers should be 8 inches. This will create additional space where you can store canned good and other household items.

Demolish by yourself

Demolishing the house may not be as expensive as renovation, however, you can still save a few coins by doing the process by yourself. However, you need to take good care of yourself to avoid unnecessary injuries. Doing a demo is mostly preferred on a deck but when it comes to the interior, it is advisable to seek the services of a contractor. Start from the front door now that you have had your house properly cleaned, the next step involves renovating. But where should you start from to make the process more effective? Of course, the front door is the first focal point.


TIPS FOR SURVIVING A LIVE-IN KITCHEN RENO

As you know, we’re smack dab in the middle of renovating our kitchen. You guys have given me SO many good tips and suggestions for surviving my kitchen renovation, I thought I’d share a bunch of my favorites here on the blog. If anyone is in the same boat… living amongst a mess and renovation- this post is a must-read! This may not be the prettiest post, but trust me when I say- there are so many amazing hacks to help you keep your sanity if you’re also planning to survive a reno.

Living in a reno is a difficult task in itself, but living through a KITCHEN renovation is a totally different ballgame. I’m not going to lie- it’s miserable. Imagine going two or three months without a sink, oven, cooktop, or in some circumstances, a fridge. Over the past couple months I’ve picked up some invaluable tricks that are helping Emmett and I survive the day-to-day without a kitchen.

Give Up Some Control

This might seem counterintuitive, but trust me- it’s better to let some things be. Depending on the scale of your reno, the house will get messy. That’s just a fact. It’s impossible and tiring to clean every single day for months on end. The end will come soon enough and there will be a day where things are neat, tidy, perfectly organized and clean once again (at least I hope so). However, until that day comes… I’ve found it’s not worth it to obsess. I had to limit my cleaning to 2-3 times per week because it was stressing me out and taking so much valuable time. There is NO way to keep up with the dust, so eventually embrace what is out of your control.

Section Off the House

Obviously there are some things you can do to keep the dust and dirt from spreading to other sections of your home. Here’s a list of things we’ve tried that I’ve found to work:

Plastic and Tape (tape off doorways)

Flat Sheets (wet the sheet and hang in the door way, in front of the plastic, when sanding- it helps to attract and catch drywall dust)

2 Pairs of House Slippers (one for the clean areas and one for the workspace… the easier to slide on and off, the better)

Shop Vac (if you don’t want to ruin your regular vacuum cleaner)

Moving Blankets (so much better than contractor paper to protect your floors- especially in the winter or rainy seasons)

Dusting Mit (this is my favorite because it doesn’t require cleaner… super quick and easy for keeping surfaces in other rooms drywall dust free)

F O O D

During most full fledged kitchen renos, there will be a point where it’s out with the old appliances and in with the new. We’ve been without appliances for almost two months now and it’s about as fun as you’d expect.


Want to renovate your home but don’t know where to start? A step-by-step guide to renovating

Don’t wait until you are halfway through your renovation to discover that you should have painted the walls before laying the solid timber floors or that the wiring should have been finished before the new ceiling went in. Follow a checklist in your renovation project for less stress and mess.

Design and planning

“Keep it simple and be as final about your decisions as you can be before you start. Changes to designs and materials during the process add delays and costs that can really destroy your budget,” says

Decide if you are going to do it yourself or hire a project manager or builder

“Employ a project manager/builder as this will keep the work flowing and they will employ licensed trades that will turn up and do a good job. You will also receive a seven-year warranty for the work completed,” says

Get council approval

You will need to check with your council to clarify the local regulations before you start renovations, says

“Are you doing additions? Are you changing the use of any rooms? (for example changing a bedroom to a bathroom.) Are you making structural changes? Are you planning a deck larger than 20 square metres and higher than one metre? Some areas require council approval for changes to the external appearance of the property, even changing paint colours,” she says.


Home Improvement: Keeping Your Things Safe While Renovating

Renovating your home is an exciting time.

Goodbye, pale green porcelain bathroom. Goodbye, carpet where the original colour is as unknown as Grannys real age. Goodbye, terrible water pressure and cramped necks from washing your hair over the bath.

With finishings and swatches, colour palettes and fixtures, installations and furnishings all occupying your mind, you might not have stopped to think about how you will keep your home and belongings secure during the renovation.

Hire The Best Contractor in the Business

This has got to be on the top of your agenda. There’s nothing quite as important in terms of safety and securing your home and possessions than checking out the credentials of your contractor before handing over the keys to your home

Find a Good Removal Company

One way to make things much less stressful is to hire a good removal company to make moving your possessions as safe and secure as possible.

Keep Things out of Sight

If you are going to keep some of your possessions in a separate part of the house or in the garage, you’ve got to make sure they are tidied well out of view of any passers by.

The Importance Of Inheritance Tax Planning

How can I reduce my taxable income?

One of the excuses I had for not contributing more to my retirement was the thought that I couldn’t afford it. In fact, 47% of Americans feel the same way I felt. In all honesty, I just didn’t want to reduce the amount of my direct deposited check. I was comfortable seeing a certain amount and I didn’t want to lower it. I had bills to pay, money to spend and money to save.

Yup, I thought that the money I was saving in my savings account earning a measly 1% in interest was better saved there! Oh to be young and naive.

I just didn’t know any better.  I didn’t understand that the money I contributed to my retirement plan was not only being invested but I was also saving money. How you may ask? I would have been saving money by not paying taxes on that money AND as a result, my taxable income would have lower. Let’s get into this!

What is taxable income?

In simple terms, taxable income is the amount of your income on which you pay taxes also know as your post-tax income. I was surprised when I received my first paycheck at 14 to see that my back of the napkin math didn’t add up to my paycheck. I quickly learned that there were things like social security, Medicare and taxes. All of which was deducted from my earnings long before I got my paycheck. (Learn more about pre-tax vs. post-tax income and how much you really make).

Does my story sound familiar? It may feel like every dollar you earn is taxed, but due to our complicated and something called our “graduated tax” system (also known as progressive tax), not all income is taxed. Examples of income not taxed include child support payments, the money you contribute to certain types of retirement accounts and money that you put aside for childcare or medical expenses. This also includes money you put in an employer-sponsored account like a Health Savings Account or Flexible Spending Account.


Top Off Your Retirement Savings Plan

Money contributed to an employer-sponsored retirement plan, such as a traditional 401(k), isn’t included in your taxable income. In 2016, you can contribute up to $18,000 or $24,000 if you’re 50 or older, by the end of the year. If you haven’t maxed out, ask your employer if you can make an additional contribution before December 31.

If you have self-employment income from a side job, you can sock away even more. You can contribute up to 20% of your net self-employment income to a Simplified Employee Pension, up to a total contribution limit of $53,000 for 2016. (Unlike 401(k) contributions, there’s no December 31 deadline for SEP deposits. You can make 2016 deposits anytime before the due date of your tax return.)

Give to Charity

If you itemize, making charitable contributions before December 31 will reduce your taxable income. For cash contributions, hang on to your canceled check or credit-card statement as proof of your donation. If you contribute $250 or more, you’ll also need an acknowledgment from the charity. Donations made by credit card before December 31 are deductible on your 2016 tax return, even if you pay the credit-card bill in January.

Donating appreciated securities can also reduce your taxable income. When you donate appreciated securities you have owned more than one year to charity, you can deduct the full value of the securities on the date of the gift. You won’t have to pay taxes on capital gains, and the charity won’t have to pay them, either. Not all charities can accept donations of appreciated securities. If your favorite cause falls into that category, consider opening a donor-advised fund. The fund administrator will sell the securities for you and add the proceeds to your account. You can deduct the value of the securities on your 2016 tax return and decide later where you want to donate the money.


Take advantage of tax loss harvesting

If you have losing investments, selling them allows you to harvest your losses to offset taxes on investment gains or to reduce your taxable income by up to $3,000.

This strategy can be especially beneficial if your income is going to be higher than normal and you want to avoid being pushed into a higher tax bracket, or if you’re going to be selling investments that you’ll need to pay short-term capital gains on.

Keep track of your medical costs

If you incur substantial medical expenses, you may be able to take a deduction for the funds you spent.

In 2019, you can deduct unreimbursed allowable medical expenses only if they exceed 10% of your income — up from 7.5% in 2017 and 2018. You’ll need to itemize to claim this deduction — which doesn’t make sense for many tax payers due to the large standard deduction.

Still, you should keep the bills you incur throughout the year. If your costs are high enough to hit the threshold for deductibility, you want to be able to take advantage of the tax savings to offset some of your big care expenses.


Get organized.

First up, be organized. Don’t just deal with your taxes once a year, in April. Instead, dedicate a folder or box to tax-related documents, and fill it all year long — with receipts for deductible expenses, 1099 forms and other IRS forms that arrive in the mail, trade confirmations and end-of-year statements from bank and investment accounts that you may need to refer to, and so on. That way, when it’s time to start preparing your tax return — or to hand off needed information to a paid preparer — everything will already be in one place.

Keep your tax-related records for a while, too. It’s smart to keep copies of your returns, at least for a minimum of three years and, to be more conservative, up to seven. You’ll likely be free from any chance of a tax audit by then.

Claim all the deductions you can.

As you know, a tax deduction shrinks your tax bill by shrinking your taxable income. If, for example, you earn $70,000 and take a $5,000 deduction, your taxable income will shrink by $5,000, letting you avoid being taxed on that $5,000. If you’re in a 24% tax bracket, that could save you $1,200.

It’s a little more complicated than that, though. You can choose to itemize and claim all your various deductions, or you can just take the “standard deduction” available to all taxpayers. That deduction has been roughly doubled in recent years, making it the smart (and easy!) move for most taxpayers.

Get the timing right

From a tax perspective, there’s a huge difference between doing something on Dec. 31 and doing it a day later. If you know an upcoming expense is going to be tax-deductible, think about whether you can pay for it this year rather than next year. Making January’s mortgage payment in December, for example, could give you an extra month’s worth of mortgage interest to deduct this year. Similarly, if you know you’re near the threshold for the medical-expenses deduction, moving that root canal up might make the pain more bearable if the cost suddenly becomes deductible, too.


Tweak your W-4

The W-4 is a form you give to your employer, instructing it on how much tax to withhold from each paycheck. If you got a huge tax bill this year and don’t want another surprise next year, raise your withholding so you owe less when it’s time to file your tax return. If you got a huge refund, do the opposite and reduce your withholding — otherwise, you could be needlessly living on less of your paycheck all year.

You can change your W-4 any time.

Stash money in your 401(k)

Less taxable income means less tax, and 401(k)s are a popular way to reduce tax bills. The IRS doesn’t tax what you divert directly from your paycheck into a 401(k). For 2020, you can funnel up to $19,500 per year into an account. If you’re 50 or older, you can contribute an extra $6,500 in 2020. These retirement accounts are usually sponsored by employers, although self-employed people can open their own 401(k)s. And if your employer matches some or all of your contribution, you’ll get free money to boot.

Contribute to an IRA

There are two major types of individual retirement accounts: Roth IRAsand traditional IRAs.

You may be able to deduct contributions to a traditional IRA, though how much you can deduct depends on whether you or your spouse is covered by a retirement plan at work and how much you make.

For the 2019 tax year, you may not be able to deduct your contributions if you’re covered by a retirement plan at work, you’re married and filing jointly, and your modified adjusted gross income was $123,000 or more. In 2020, that number rises to $124,000.

There are limits to how much you can put in an IRA, too:

For 2019 and 2020, the limits are $6,000 per year, or $7,000 for people 50 or older.

You have until the tax-filing deadline to fund your IRA for the previous tax year, which gives you extra time to take advantage of this strategy

Tips On Choosing The Right Auto Repair Dealer

Should You Use an Auto Repair Shop Recommended by Your Insurance Company?

When your car has been damaged in an accident, one of the most important things you can do is find a quality auto repair shop that will make it truly roadworthy. Your insurance company may offer to relieve you of the burden of finding a reputable repair shop by giving you a list of its own preferred providers. This is a tempting offer when you’re in a hurry to get back on the highway and not eager to check out repair shops on your own.

Insurers typically tell policyholders that they have carefully checked out these businesses to make sure they do quality work at reasonable prices. Your carrier may offer to guarantee any work that is performed by shops on its preferred list.

“What you want to do is find the repair shop that does the best job,” she says. “That isn’t necessarily the one they would recommend because they’re into cutting costs. In general, it’s a good idea to pick your own place. Do your own shopping. Look at reviews and decide on your own where you want your car to go.”

attorney and founder of the nonprofit Consumer Watchdog organization, says many consumers don’t realize that state insurance regulations around the country typically allow them to choose their own repair shops following accidents.

Because insurance-affiliated repair shops depend on insurance carriers for their business, in some cases they may more concerned with how much they’re costing your insurer than how well they’re repairing your vehicle, Rosenfeld says. “You’re at a disadvantage when you’re dealing with a car repair facility whose principle allegiance is to the insurance company,” he says.


THINGS TO KEEP IN MIND WHEN FINDING AN AUTO REPAIR SHOP

Don’t Wait Till You Need It: Try to find an auto repair shop that you trust before you’re stuck on the side of the road. Having someone who knows you and your car when you call can save both you and the shop time and get you out on the road quicker.

Take Your Car In For A Trial Run: If you are unsure an auto repair shop is right for you, try taking your vehicle in for a small thing and see how they do. This way you can make a good assessment of how you’re treated as a customer without spending too much money.

Does The Shop Have Certified Auto Mechanics: Making sure that the people working on your car are certified by the ASE (Automotive Service Excellence) to work on the specific make of your car is always a good idea? Luckily our mechanics go through the ASE training and certification process.

How Long Has the Shop Been in Business: The longevity of a business is a good indicator of what kind of service you will receive. Keep in mind that if customers were unsatisfied the business would probably have folded a long time ago.

How Involved Are They in The Community: Auto repair shops are in the business of keeping return customers happy and spreading the word. A good way to do this is through positive outreach so try to see if the shop has any sort of community involvement they are participating in.

Make Sure The Shop Can Handle Your Car: It seems as though every year brings new updates to the automotive world. Sometimes it can be hard for auto shops to keep up with the ever-changing needs of the automotive world. It’s always a good idea to call ahead of time to make sure the shop can work on your car. Chances are if the place you call cannot work on your car they will refer you to someone who can.

Ask Questions: Make sure that you have questions ready when going to a mechanic or auto repair shop for the first time. It’s always good to know more about the vehicle you’re driving but this will also show them that you are taking the situation seriously.

Location & Transportation: How far away is the car repair facility from where you are? Do they offer any sort of transportation assistance while your car is in the shop? These are two great questions to ask as the shop will probably have your car for at least a day.

Only Pay For What You Authorize: Some shops will do work on your car without notifying you and then try to charge you afterward with no warning. You may owe the initial quoted cost but no shop can work on your car without your permission and they cannot hold your car as collateral.

Keeping Personnel Records: Regardless of whether or not you’re looking for a shop it is always a good idea to keep a record of when your car was last serviced and any repair it has had up until the point you bring it in. This information will help the shop assess what might be wrong and you can avoid having to pay for extra things you might not need.


How To Run A Successful Auto Repair & Mechanic Shop

Most people have become leery of using just any auto repair shop and prefer to stick with one they trust. Make sure you are one of those trusted auto repair shops.

Reduce Your Employee Turnover Rate

Establishing reliability and consistency is extremely important when running an auto repair shop. This is hard to accomplish when you have a high turn over rate of employees which can lead to inexperienced new workers who need to be guided into better mechanics which can take time. Reduce your employee turnover rate by treating your employees well, giving good benefits and paying them well. This will also make your customers more comfortable working with you when they see the same mechanics each time they come in for auto work. It’s hard to trust an auto shop when they have a different mechanic working on their vehicle every single time they come in.

Stand Behind Your Work With Guarantees

Make sure your customers know that you trust your own work by giving a guarantee on your repairs for certain amount of miles or time. If you repair someone’s brakes, for instance, this will show them your not doing a shoddy job, causing them to come back in a few months to have the work done again. Give them a reason to trust your work and make them more likely to come back to you in the future.

Create An Ethics Statement & Display It Prominently

Given the unease that many people have when working with an auto mechanic, create an ethics statement describing your stand on honest, trustworthy work. State that you provide reliable service and are not trying to scam anyone. Explain that you will only provide necessary repairs and service and will not try to charge them for services that they don’t need. Once you’ve created the ethics statement, display it in a prominent place in the guest waiting room where anyone can see it.

Always Reward Your Loyal Customers

Make your regulars feel appreciated by rewarding them for being loyal customers. Send them coupons for discounted work or give them a free oil change from time to time. There may be some upfront losses in revenue but will end up paying out in the long run as you start to build up a client base who will only come to you for auto repairs and refuse to go anywhere else. On top of that, those customers are also more likely to refer you to their friends and family.


Tips For Tackling Your First Big Car Repair

You’re a capable weekend car mechanic. You’ve got basic tools and skills. You’ve mastered oil changes and tire rotations. But when a big repair comes along, it’s decision time. Take it on yourself, or call in a pro?

That’s the choice I faced at the end of last summer, when my 1990 Mazda Miata suffered a crankshaft failure. Expecting a quick repair, I soon discovered the car needed a whole new engine—and I discovered this just after I’d disassembled it to the point that it couldn’t be put back together.

Instead of paying a mechanic to mend my Miata, I decided to try replacing the engine myself. I did it—eventually—though I made plenty of rookie mistakes on the way. Here’s what I learned.

Do Your Research

Aftermarket shop manuals are great for learning the tools and parts you’ll need, but they sometimes read like a general overview (step one: remove radiator, front bumper, and windshield washer reservoir). Internet forums can offer detailed instructions and tricks specific to your car, usually with step-by-step photos.

Set Up Your Workspace

I started my teardown in the corner of my parents’ two-car garage. I got all set to pull the engine when I discovered I had no room to maneuver my engine hoist. Even with two muscular brothers, moving a half-disassembled car was a masochist’s game of Tetris. So don’t make my mistake: Clear plenty of space before you start the job, and position your car for maximum elbow room. I found the best spot was right in the center of the garage, though not everyone in my family shared this view.


WHAT IS THE DIFFERENCE BETWEEN AUTO MAINTENANCE AND REPAIR?

If you’re a car owner, it’s critical to know the difference between auto maintenance and auto repair. Both of these things are important to the overall performance, but they have different functions.

Maintenance is regular service that is required for your vehicle while auto repairs are performed when your vehicle is not functioning properly. Your owner’s manual will have a list of maintenance schedules with recommendations on what needs to be done and when. The most common regular maintenance, that everyone has heard of, is oil changes. Yet that’s not the only service that’s crucial for your car’s performance.

Here’s a list of common auto maintenance needed to keep your car in tip-top shape:

Oil Change

Battery

Brakes

Tires

Power-Steering Fluid

Fuel Filter

Coolant

Engine Belts & Timing Belts

Spark Plugs

That’s quite a list! It seems like a lot of things you need to manage, but many of these services are simple procedures that your auto repair facility can complete that day or with an appointment. Many customers delay maintenance for various reasons. They may think it’s unnecessary, they may be too busy to bring their vehicle in, they may want to delay paying for auto services, or they might not realize that doing maintenance now can save money in the long run by avoiding repairs. It’s OK if you don’t know the difference between a spark plug and an oil cap – as long as you bring your vehicle to a reputable shop for regular maintenance. In a nutshell: performing regular auto maintenance helps keep your ride running smoothly and can prevent costly repairs down the road.

Maintenance is regular service that will help prolong the life of your vehicle, while auto repair is when a part or fluid is not performing and needs to be fixed.

Water Testing Methods: Analysing Water Using ION Concentration Testers

What To Know About Mold Swabs and Air Quality Testing

Air Quality Testing

Air sampling tests the concentration of mold spores in your home’s air.  Samples are taken from the air and are later examined under a microscope.

Air tests can tell you if you have a mold problem even if you cannot find the mold growth. However the amount of mold spores in the air can change drastically in a small amount of time, giving varying results at different times.

Mold Swabs /Surface Samples

Surface testing takes samples from household surfaces to find the amount of mold growth and spores deposited around the home. Samples are collected by swabbing.  The sample is then examined in a laboratory.

Like with air testing the results can vary because mold growth and spores aren’t spread evenly across surfaces in the home and can change over time. Unlike air testing though, surface tests can’t identify the exact concentration of mold spores in the air.

Why You Should Test for Mold

The main reasons for having mold testing performed in your home are:

  • You notice signs of mold such as a mold smell or mold symptoms
  • To identify the species of mold in your home
  • To help you find where mold is growing-
  • To test indoor air quality by measuring the amount of spores in the air
  • To test if mold in your home has been fully removed

Identifying Mold Species

Another reason for mold testing is if you want to find out what kind of species of mold is in your home. This is important for toxic molds since extra caution needs to be taken to safely remove toxic mold from the home. Two well-known toxic molds are Stachybotrys (often called toxic black mold) and Aspergillus. If you see mold which looks like a toxic species or if you are suffering toxic symptoms then you should have it tested before you try to remove it. The only way to identify the species of a mold colony for certain is to have a mold professional look at a sample of it under the microscope.


What Happens in a Full Mold Inspection?

If you suspect you have a mold problem, you can also bring in professionals for a mold inspection. Mold inspectors can search for mold in hard-to-reach areas of your home. They can search:

  • Walls and Wall Cavities
  • Foundation Walls and Crawl Spaces
  • Air Conditioning Systems and Heating Vents
  • Attic Spaces and Chimneys

A visual mold inspection can give you incredibly thorough answers about any fungal infestation in your property. Some mold inspectors will even perform an air quality test to increase their understanding of your situation. Mold inspections are your most expensive option for mold testing, but they can provide you with the most comprehensive answers.


How to Test Air Quality in The Home

There are many factors that can affect the air quality in your home. For the health and safety of all, it’s necessary to have the air quality in your home tested. The rule of thumb is the higher the indoor air contaminant concentration, the higher the health risks. The air pollutants in your home can come from harmful gases in the air or from mold growths. Mold and mildew can grow anyplace — on furniture, building material, wet carpet, inside the heating and cooling systems, as well as a host of other places. These mold spores can be very harmful. Harmful gases can be even more dangerous. The two most prevalent gases in homes are radon and carbon monoxide [source: Colorado State University]. Here are some ways to test the air we breath.

  • Carbon Monoxide Carbon monoxide is a very dangerous, colorless and odorless gas that is generated from incomplete combustion of fuel in household devices, such as stoves, furnaces, water heaters and fireplaces. Carbon monoxide can get into your lungs and inhibit the transport of oxygen through the body. Prolonged exposure to carbon monoxide can result in death. The only way to detect the presence of carbon monoxide is to purchase a carbon monoxide detector. This works like a smoke detector, sounding an alarm when the carbon monoxide level rises.
  • Radon Radon is also a colorless and odorless gas that rises naturally from the soil and enters the home through dirt floors, cracks in the basement floor and walls, and drainage systems. It is thought to be a major cause of lung cancer. The only way to test for radon is to purchase a radon detection kit.
  • Biological Pollutants Mold, mildew, viruses, bacteria and pollen are all considered biological pollutants. Mold and mildew grow in damp conditions resulting from high humidity, water-pipe leaks and constant condensation. Visual inspection and odor are the only ways to detect biological pollutants. When mold and mildew are found, you must clean the area thoroughly with ammonia, or some similar cleanser, to kill off the spores


How Easy Is It to Use a Home Testing Kit?

Most testing kits follow a similar process that is quick and easy to follow. In most cases, you will just need to take these steps:

  • After opening your testing kit, you will follow the directions for collecting air or surface samples from around your home. The kit will have all of the materials that you will need to collect your samples.
  • Take your samples and package them in your mailing envelope that comes included in your kit, and send them to the laboratory. The testing fees will be included in the price of the kit.
  • You will usually receive the results of your samples in 7 to 10 days after the testing is completed. This package will include a detailed report of the findings of the tests as well as specific suggestions on how you can improve these problems that they have detected. If you have further questions about the results, a contact number or email address is often included with the results.

As you can see, this combination of materials will give you all of the tools you will need in order to make your house a healthier place.


Combustion air pollutants

Second-Hand Smoke

Secondhand smoke – From anything that burns tobacco, as well as what a smoker exhales. Tobacco smoke contains over 4,000 compounds, and at least 40 of those are carcinogens. Besides the risk of lung cancer for anyone breathing it, secondhand smoke increases the risk of respiratory infections, especially in infants and children. For kids or anyone with asthma, it can be particularly harmful.

Detection is easy enough. Tobacco smoke is easily seen and smelled. It seeps into fabrics, hair, and furniture. The yellow residue can cling to windows and mirrors.

Prevention is fairly simple. Don’t smoke in your house or allow anyone else to smoke inside. If you live in an apartment complex or other situation where a neighbor’s smoke comes in your home, you’ll need to find ways to seal up air leaks. Investing in a good air purifier placed near the source of entry is another solution.

Carbon monoxide – This gas, in high concentrations, can cause unconsciousness or death. Low concentrations lead to headache, dizziness, nausea, fatigue, weakness, and confusion. It’s so dangerous because it’s colorless and odorless.

CO is emitted mostly by things that burn fossil fuels: stoves, fireplaces, kerosene heaters, gas-powered generators, cars, etc. Prevention lies in keeping flues and chimneys clear of blockages and never running gas-powered vehicles or machines indoors. However, some indoor gas appliances can malfunction and emit dangerous levels of CO.

The One Week Silverfish Control Method

Silverfish Information: Habits & Identification

Silverfish are small, silvery insects that thrive in humid environments. While they are capable of traveling long distances on foot, they tend to build colonies close to readily available food sources. This makes them particularly problematic in the Atlanta, Georgia region. Once they have found a source of food, they set up camp in dark, damp corners, usually in attics, old boxes, or kitchen cabinets. They are most active during the night when they will leave their nest area to feed, making it hard to manage silverfish control on your own. In addition, they can eat through wallpaper and thin wood cabinets, creating tiny visible holes. Unfortunately, the insects themselves are very fast-moving and difficult to see unless you stumble upon their nest. This makes silverfish control exceedingly difficult.


Silverfish & Firebrats

Homeowners usually see silverfish and firebrats when a cabinet door is opened, or a book or other object under which they were hiding is moved. Silverfish and firebrats are pests because they feed on a wide variety of materials, including glue, wallpaper paste, starch in clothing, book bindings, linen, rayon, paper and dried meats. Signs of their feeding are irregularly chewed patches.

Description

Three species of silverfish and one firebrat species are found in South Carolina.  Silverfish and firebrats are very similar in appearance. They have flat, wingless, elongated bodies, 1/2 to 3/4 inch long that taper from head to tail. At the head are two long antennae with three long antennae-like structures at the tail. Depending on the species, silver to gray scales cover their bodies.

Life Cycle

Adult silverfish may live two to eight years. In a lifetime, silverfish females lay about 100 eggs. They are laid singly or a few at a time and hatch in three to six weeks. They take on the adult color in four to six weeks.

Firebrats lay about 50 eggs at a time in batches. The eggs hatch in about two weeks under warm conditions. Young silverfish and firebrats look like the adults except for being smaller and white.  Depending on the species, silverfish and firebrats typically reach maturity in three to twenty-four months.

Habits

Silverfish and firebrats are active at night and hide during the day. In general, silverfish prefer damp, cool areas and can be found throughout the home. Firebrats prefer hot places, such as near ovens, fireplaces, furnaces and hot water pipes. Silverfish and firebrats are typically brought into a home in food, books, paper, starched clothing and furniture.  Their populations tend to increase slowly. If a large population is present in a house, it is usually an indication of longtime infestation.


Ways to Exterminate A Silverfish Infestation

Have you seen silverfish around your property?

Have you found holes in your favourite books, or clothes?

Having a silverfish infestation is a problem in many Australian homes. Although they seem harmless, these insects feed on starchy objects, especially books and paper products. And because of their small, flat bodies, they can squeeze through any space, making it difficult to exterminate them and prevent further damage. But what are your options for eliminating them once and for all?

Decrease food sources in your property

Silverfish hangs around your property for two things: food and shelter. When you eliminate their food source, they will most likely look for other places to nest in. Do this by regularly cleaning up the floors, washing the laundry as soon as you can, and avoiding storing books on the floor as they will be easy for the silverfish to access. You may also want to store old clothing in plastic bags, keeping food in sealed plastic containers, repainting walls or adding new wallpaper, and storing storage boxes in shelves rather than placing them on the floor, causing them to catch moisture and become a breeding ground for silverfish.

Fill up the cracks and crevices where they might pass through

Because silverfish can enter through cracks and crevices in the walls, ceilings, and floors, it’s a good idea to fill them in with some caulk. Doing so will prevent them from having entryways, quick exits, and a nest to lay their eggs. Prioritise putting caulk in damp rooms such as bathrooms and laundry rooms.

Sprinkle diatomaceous earth near where they crawl

Diatomaceous earth, a form of white powder created from algae, is highly-effective when used for silverfish. Sprinkle it on areas where silverfish might roam and you can eliminate them easily. When DE gets in contact with the silverfish, it sticks to their bodies and their waxy coating absorbs the moisture they have in their bodies, causing them to die.

Reduce your property’s humidity levels

Silverfish thrive in humid and moist areas of the property. Their favourite hiding spots are leaky pipes, wet bathrooms, and damp basements among many others. To make your home unappealing to these pests, seal out exterior cracks with caulk. You may also use a dehumidifier in your home which can reduce the overall humidity of specific areas. If you don’t have a dehumidifier, you may also keep the air conditioner on or keep the fans on for a given amount of time each day.


Silverfish Characteristics, Diet, Reproduction and Lifecycle

Silverfish are grayish-blue creatures with a teardrop-shaped body. They have three long bristles at their back and can grow up to 19mm in length. Although these insects do not pose serious harm, they are usually annoying to have around the house. They’ll eat your books, anything made of starch and sugar, your clothes, even dead skin cells, etc.

If there is a silverfish in your place and you fail to spot them early, you may have to face silverfish infestation in no time. This insect reproduces quickly, making it difficult to eradicate an infestation. Some species of female silverfish can lay up to 20 nymphs (eggs) a day, usually in crevices and cracks. The eggs are only about one mm in length so they are barely visible to our eyes. They are white and soft when first laid but become yellowish and hardens after a few hours. The eggs develop faster in a humid environment.

A silverfish can live up to three years. Just imagine the number of eggs it can lay throughout their lifetime!

When it comes to attitude, silverfish are known to be shy, reserved, and quite secretive. Because of their size and being secretive, it is difficult to spot silverfish.  But just because you cannot see a silverfish around does not mean that they do not exist. They may be lurking in the cracks of your home. If you see one, there may be more. Frequently, homeowners find them when it is too late or when the insect’s population already grow exponentially.


Ways to Prevent the Silverfish from Coming Back

Whether you have already experienced having these creatures around your house or not, it pays off to know what you should do to keep them away. As the adage goes, “Why spend all your time trying to solve a problem that you would like, just avoid having in the first place?”

  1. Keep Your Place Clean

Prevention is always better than cure. Silverfish thrives in damp, dark, and moist areas such as under sinks, basements, bathrooms, attics, and closets. They also love the taste of wet wood and paper so you can also find them around cereal boxes, magazines, books, behind wallpaper, and along with rotting window sills. In short, they take shelter in a dirty, cluttered, and unkempt house. If you wish silverfishes to stay away from your property and your life, keep everything in your place clean. It is basic. A vibrant, spotless, and fresh place does not attract unwanted beasties.

  1. Declutter and Vacuum Regularly

Silverfish usually hides in and often feasts upon old books, papers, and magazines. So if there is a pile of paper in your desk, there is a high chance that you’ll meet Silverfish again. Start getting rid of stuff you do not need or haven’t looked at in for a long time. The important papers, on the other hand, should be stored in airtight bins. Aside from decluttering, it is also essential to vacuum your place at least once a week. The vacuum can suck Silverfish eggs out of the baseboard and carpet. If needed, dry out the carpets through spraying baking soda in them. Leave the baking soda in the carpet for a few hours before vacuuming. The purpose of this is to dry out the eggs. Vacuuming can also help to remove food sources which may attract silverfish.

  1. Light Up Dark Areas of Your House

Silverfish are nocturnal creatures so they tend to squeeze their bodies into dark and tiny spaces and gaps in your home. They hate light. Therefore, giving them what they dislike is one of the ways to keep them away. Let lots of light into areas and rooms that are predominantly dingy and dark. If you have an unused room, try installing new lighting or simply draw back curtains if there are some. The goal is to get rid of silverfish dungeons and any substantial shadows.

  1. Use a Dehumidifier

An environment with a constantly humid atmosphere is an ideal place for silverfish. Keeping your place dry is important in preventing silverfish from coming back. This can be a big task especially for those living in areas with the winter season. Good thing, dehumidifiers are now available. Dehumidifiers can work wonder when it comes to casting out unwelcome silverfish.

  1. Seal and Caulk

All those cleaning and vacuuming efforts will come to naught if you leave a small hole or an opportunity for silverfish to enter your house. To get rid of uninvited roommates forever, seal all entry points such as cracks and holes in your house specifically in your attic, basement, or any other dark, tight, and cold areas. A simple sealant or waterproof caulking will do the job. Also, ensure that there no pipework or plumbing is leaking moisture or is exposed to the outside.