Tips on How to Replace the Wax Ring on a Toilet
Beneath every toilet is a sticky wax ring that forms a watertight seal between the toilet and the sewer pipe. This hidden ring silently keeps your floors dry and can last for years without ever needing maintenance.
Why wax? The wax is formed in a loop around a plastic tube. It shapes itself to fit almost any toilet and floor drain, making installation pretty much foolproof. The wax is mold and bacteria resistant and can retain its seal for many years.
Here are a few times when replacement may be necessary:
If you have to remove your toilet for any reason, you should plan to replace your wax ring. Lifting the toilet will break the seal and if the wax is old, it may not reseal.
Does your toilet wobble? If you notice that your throne has developed a side-to-side rocking motion (even a little), it could mean the anchor flange is broken. This will have to be replaced along with the wax seal.
Do you notice dampness collecting around the base of your toilet? If it looks like your toilet is leaking, it may indicate that the wax ring has failed.
If you are replacing your flooring, you may need to remove your toilet and replace the wax ring to ensure a proper, tight seal.
If your toilet is on an upper floor, you may notice water damage on the ceiling of the room below. This is a sure sign that something’s not right, and the first thing to check is the wax seal. Sagging or soft spots on the bathroom floor near your toilet could also point to water damage.
Replacing Your Wax Ring
Wax rings are inexpensive and can be found at most hardware stores. Make sure you have a few essential tools on hand before you start the replacement: an adjustable wrench, a putty knife, a bucket, disposable gloves, and a towel or paper towels. A wet/dry shop vac will help make the job easier if you have access to one.
Step 1 – Turn off the water supply line that connects the toilet and the wall.
Step 2 – Drain the toilet by flushing, removing as much water as possible. If you have a shop vac, use it to suck up any remaining water. Don’t have access to a wet/dry vacuum? Use a plunger to help force as much additional water out as possible, then have your towels ready to sop up anything that leaks out.
Step 3 – Disconnect the water supply line from the bottom of the toilet tank. A little water will be left in the line, so be prepared to catch it with a bucket.
Step 4 – Remove the decorative caps that cover the bolts at the base of the toilet, then use your adjustable wrench to remove the bolts and washers.
Step 5 – Gently rock and twist the toilet to break what remains of the old wax seal. When you’re ready, make sure to grasp the toilet near the center so that the weight of the bowl and the tank are distributed evenly. If it’s too heavy, you can remove the tank portion and move them separately.
Step 6 – Put on your disposable gloves for this part. The wax is very sticky and, well, it’s been chilling under your toilet for a long time. Use a putty knife to remove as much of the old wax as possible from both the floor and the bottom of the toilet. Check to make sure the flange (the top of the sewer pipe) isn’t cracked or damaged in any way, then stuff a towel into the top of the pipe to prevent any noxious gases from escaping until you’re ready to replace the toilet.
Step 7 – Most wax rings can be affixed either to the bottom of the toilet first or the top of the flange – whichever you’re most comfortable with will work. Double check the instructions that come with your new ring to ensure that you’re installing it properly, but this part should be easy. Once the ring is centered in place, carefully lower the toilet onto the flange, using the bolt holes on the toilet base and the flange to line everything up properly.
Step 8 – Close the toilet lid and sit down. Use your body weight to compress the wax seal and settle the toilet into place. Once it feels solid, check to be sure the base of the toilet is completely flush with the floor all the way around.
Step 9 – Replace the mounting bolts and decorative covers, then reattach the water supply line and make sure the supply valves are open. Give the toilet a few test flushes and check all around the base for any sign of leaks.
The Best Bidet Toilet Seat or Washlet
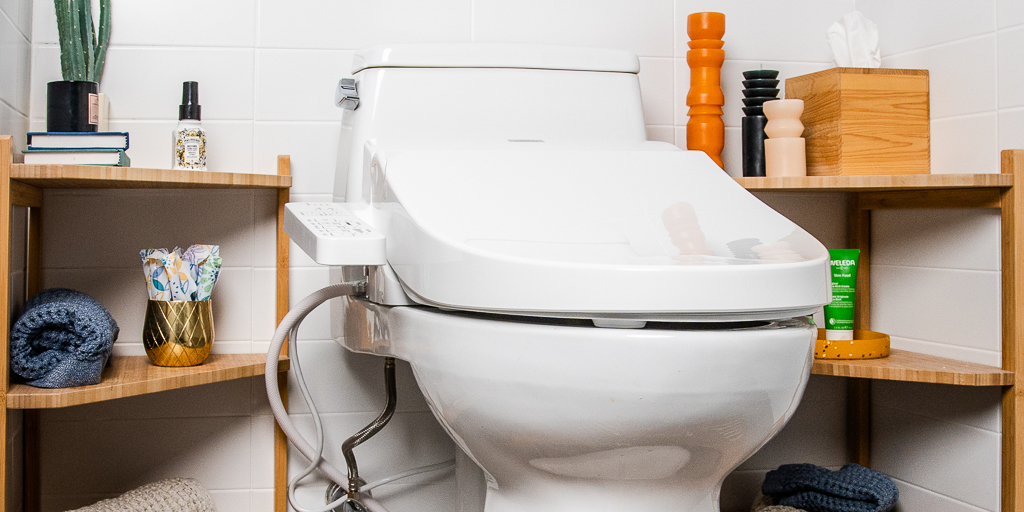
People have strong opinions about washing their butts, but one thing is for sure: The Toto Washlet C200 is better than any other bidet seat at dialing in your exact preferences—pulsating or oscillating stream, warm or cool water, high or low pressure. And thanks to the C200’s unique, intuitive controls, you’ll find that it’s just as easy to disable the bells and whistles if you’re in it only for the heated seat.
For an experience that most people agree is excellent, whether they’ve used a bidet for years or are totally new to it. Other bidets have similar abilities, but none of them are quite as easy to get the hang of as the C200, even for guests and children. That’s because of the simple layout of the remote control, which predictably activates or adjusts the things you want. Some bidet features can be annoying or unnecessary, and it’s easier to disable those features on the C200 than on other models. It may seem like a lot to pay for a toilet seat, and the negative reviews include a few stories of installation difficulties. But we’ve found that very few people actually regret getting a C200—more often, they find they have a lot of preferences, and they value the easy control over all the options.
The main difference is that this model has a white plastic side control panel attached to the seat, as opposed to the C200’s exceptional (and stylish) remote. This makes the C100 more awkward to use, but the side panel is easy enough to learn by feel, so you won’t have to contort to see it every time. Compared with the C200, this model also has two fewer options for water temperature and no programmable user settings, but the C100 typically costs anywhere from $50 to $150 less. We do recommend that you wait until the C200 comes back in stock. But if you can’t wait, or if you want a less expensive model for a guest bath, the C100 is nice where it counts—a heated seat, warm water, and pressure controls that (like the C200) go up and down on a +/- scale. (A lot of competitors’ pressure controls cycle through all the levels, including a Waterpik-like beam, before you can get to the one you want.)
the lowest-priced electric bidet seat we recommend. It’s a bare-bones model compared with the C200, but with its six options for water pressure, water temperature, and seat temperature, you should be able to adjust the Swash 300 to your preferences. This model can’t adjust its spray position like the C200, and it takes a few seconds longer to warm the water. It also lacks an air dryer and other frills. But the Swash 300 does have a remote, an unusually nice feature for a bidet at this price, and we think it’s a good deal.
The good news: Unlike the other models, the SimpleSpa doesn’t need an outlet. And it doesn’t include a new toilet seat, so it’s very easy to install and won’t alter the aesthetic of your bathroom. Watch the pressure, though—some testers found this model’s highest settings painful. Compared with other inexpensive cold-water models, the Brondell SimpleSpa looks nicer for about the same price. And since it’s less than $50, this model is a good place to start if you’re new to bidets and are unsure about investing in a full-featured model.
How much does it cost to install a toilet?
Costs for toilet installation in the UK generally range from $100 to $191. Still, this may vary depending on the aspects involved in your installation. At some point during your homeownership experience, you may find you need to install a new toilet in your home. It’s an important step in every bathroom remodelling project, however, fitting a toilet doesn’t need to be a difficult task.
Considerations
While toilets are durable, the time will eventually come for a replacement. If you need a new one, make sure you plan out your project before hiring a toilet installer.
Number of Toilets to Install
When you first contact your pro, give them an idea of the project size. If you’re replacing a broken toilet, the answer is usually one. The same applies when you’re renovating your bathroom. At the same time, keep an eye out for a model that conserves water so you can make your home more efficient.
Current Plumbing
Thankfully, when you replace a toilet, the necessary plumbing already exists. You shouldn’t have to adjust it, but you may want to have your pro check it out. They can confirm it’s up to code. Upgrading or adjusting your plumbing can add to the cost. Ask a plumbing expert to give you a quote if you need to change your current setup.
Project Materials
Depending on where you are in your preparations, you may already have a new toilet in order. It could even be waiting in your garage to find its new home! However, if you don’t have a new toilet picked out you can ask your pro for advice. A pro can tell you what the most popular brands are or recommend a certain model for your needs.
How to Install a New Toilet Seat
Installing a new toilet seat is an easy DIY project. Whether you’re replacing yours because it’s old, or because you just want a new style, all you need are some basic tools and a few minutes. Unbolt the old seat, then pop the new one in place using the hardware included in your new toilet seat’s box. The only trouble you’re likely to run into is if the old bolts are stuck, but a little elbow grease can take care of that problem.
Measure your current toilet bowl before buying a new seat. Most toilets are standard sized, and any replacement seat should fit. If you want to be extra sure, take a tape measure to check the distance between the bolt holes in the toilet bowl. Then make sure the distance between the bolts on the replacement seat is the same.
Choose the style of seat you want. Toilet seats come in 2 basic styles, and a home supply store should have several brands to choose from. The standard variety is rounded, but you can choose an elongated one if you prefer. You can also purchase a “whisper close” seat that has special pads on the bottom to prevent it from slamming down on the bowl
Choose a seat color that matches your current toilet bowl. You can find toilet seats in a variety of colors. Choose one that matches the toilet bowl (usually white) for a classic look, or choose a contrasting color to make a bolder statement. For instance, you could choose a blue or wooden toilet seat to contrast with a white bowl.
Gather your tools for the project. You’ll need just a few simple ones to handle this project. If you don’t already have these at home, head down to the hardware store and get
Toilet Repair Information & FAQs
Toilets save lives. It might sound crazy, but it’s true. Proper sanitation in the form of functioning toilets and well-maintained sewage systems helps prevent potentially life-threatening diseases from attacking you and your family. In the United States we are incredibly lucky that the majority of us never have to worry about catching such illnesses, but it is still important to keep our toilets clean and in good operating condition to avoid the potential for illness to our families – in addition to saving ourselves the general hassle and high cost of toilet problems left unattended for too long
Finding the Right Parts for Your Toilet …pssst, it’s easier than you think!
Toilet repair tends to freak most people out a little, which is completely understandable. Nobody wants to accidentally break something that could flood their bathroom with raw sewage. However, the majority of toilet repairs are simple and straightforward tasks – such as replacing a worn flapper – that most people can do themselves in about 5 minutes. The most common question we run into regarding toilet repair is how to find the right parts for your toilet. Sometimes this is easy, and sometimes it’s not. Mostly it’s easy though.
The first step in finding the right toilet parts is figuring out your toilet model number – so we’ve created this handy toilet identification cross reference to help you out. Alternatively, if you already know which manufacturer made your toilet, you can look through our toilet index pages (linked below) to find your parts. If you can’t find any model information – i.e., you have a “mystery” toilet – read our guide to finding “will fit” parts for more assistance.
- “What is the difference between “OEM” and “will-fit” parts? And what do these terms mean anyway?”
- OEM stands for “Original Equipment Manufacturer”. This means anything from the original manufacturer that is sold to a second company to use in production of that second company’s product. In other words, many toilet manufacturers outsource for the internal working parts of the toilet, such as the fill valves, flush valves, or flappers. When this happens, they have the opportunity to use an existing part, or to spec something for the specific toilet. When the toilet manufacturer chooses to use an existing part, the manufacturer of the part can still sell that piece under their own name – these are considered “will fit” parts. If the toilet manufacturer chooses to spec something for the specific toilet, the part manufacturer can then only provide that part to the toilet manufacturer. What this means for you is that you can sometimes get the *exact same part* (by the original manufacturer of the OEM part), but under another name and at a better cost! So when your toilet’s internal working parts need to be replaced, you may have the option to use either the “OEM” part number or use the “will-fit” part number to order what you need. Please note that only some “will-fit” items are manufactured by the OEM manufacturer. If this is essential to your repair
- “What are the most commonly replaced toilet parts?”
- This depends on several factors; each time you use your toilet the trip lever, flapper, and fill valve are operated. You will find, however, that the flapper and fill valve are the parts most exposed to water and will be the first ones to wear out in most cases.